How to Install a Gravel Grid
Installing a gravel grid is a DIY-accessible project that most homeowners can complete over a weekend for a standard residential driveway or pathway. The process has six stages: marking out and excavating, preparing the sub-base, laying the geotextile membrane, installing edging, placing and interlocking the grid panels, and filling with aggregate. Getting the sub-base preparation right is the step that determines the long-term performance of the installation.
What You Need Before You Start
Before ordering materials, calculate the area of the installation in square metres or square feet. This gives you the panel quantity, aggregate volume, and membrane area you need to order. Add 10 percent to all material quantities to allow for cuts, overlaps, and any variation in fill depth.
Materials required:
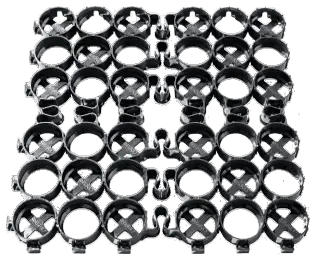
- Gravel grid panels (quantity based on installation area)
- Geotextile landscape membrane (area plus 150mm overlap on all edges)
- Compacted sub-base aggregate – MOT Type 1, crusher run, or clean crushed stone (see quantity guide below)
- Fill aggregate – 10mm to 20mm clean angular stone (see quantity guide below)
- Edging material – treated timber boards, metal edging strip, or plastic landscape edging
- Edging stakes or fixing pins
Tools required:
- Spade and wheelbarrow for excavation
- Plate compactor or hand tamper for sub-base compaction
- Long straightedge and spirit level for checking levels
- Tape measure and line pins for marking out
- Handsaw or jigsaw for cutting grid panels
- Rake for spreading aggregate fill
TRUEGRID PRO LITE permeable pavers are lightweight, DIY-friendly driveway and outdoor base pavers that install easily for a variety of projects. Made in the USA from 100%...
Step 1: Mark Out and Excavate
Mark the installation boundary using line pins and string, chalk, or marking spray. For a driveway, mark the full driveway width plus any marginal areas. Allow the installation to extend at least 150mm beyond the intended surface edge on any side that does not have a fixed boundary such as a wall or fence.
Excavate to the required depth. The excavation depth is the sum of the sub-base depth plus the grid panel depth plus 10mm to 15mm for the geotextile membrane.
- Pathway installation: excavate to approximately 75mm to 100mm below finished surface grade
- Driveway installation: excavate to approximately 150mm to 200mm below finished surface grade
Remove all excavated material, including roots and organic topsoil. Do not leave organic material in the base of the excavation, as it will decompose and cause settlement.
Step 2: Prepare and Compact the Sub-Base
The sub-base is the most important element of the entire installation. A gravel grid system performs well on a properly prepared sub-base and poorly on an inadequate one. The grid does not improve a poor base – it depends on the base for its structural performance.
Compact the bottom of the excavation with a plate compactor. If the native ground is soft, waterlogged, or shows spring when walked on, additional excavation and base depth is needed before proceeding. The sub-base layer should be built on firm, stable ground.
Lay the sub-base aggregate in layers of 50mm, compacting each layer before adding the next. For a driveway sub-base, two 50mm compacted layers gives a 100mm total depth. For heavier use or softer ground, three layers and 150mm total depth provides greater structural capacity. The sub-base specification for different ground conditions and load levels is covered in full detail in our gravel driveway installation guide.
Check the finished sub-base surface for level using a long straightedge. Any significant high or low points should be corrected before laying the membrane – unevenness in the sub-base creates unevenness in the finished grid surface.
Step 3: Lay the Geotextile Membrane
Roll out the geotextile membrane over the prepared sub-base, starting from one end of the installation area and working to the other. Overlap adjacent membrane strips by at least 150mm. Fold the membrane up the sides of the excavation at the perimeter and cut it to sit 50mm above the planned finished surface level.
Pin the membrane to the sub-base using plastic membrane pins at the perimeter and at any overlaps. Do not leave the membrane loose before installing the grid, as wind can shift it and create folds that affect the grid level.
Can you lay gravel grids on existing soil without a membrane? Technically yes, but it is not recommended. Without a geotextile membrane, soil fines migrate upward into the grid fill layer over time, reducing drainage performance and eventually causing the cells to fill with muddy material. The membrane is a low-cost addition that makes a meaningful difference to long-term performance.
Step 4: Install Edging
Install perimeter edging around the entire installation boundary before placing any grid panels. The edging provides the lateral restraint that prevents the outermost grid panels from spreading outward under load and keeps the entire panel array together as a coherent surface.
For driveways, treated timber boards of 50mm x 100mm section, set with the 100mm face vertical and the top at finished grid surface height, work well. Drive stakes behind the boards at 600mm to 900mm centres to hold them in position. For pathways and patios, metal lawn edging strip pinned at 500mm centres is tidier and easier to install around curves.
The top of the edging should sit at the intended finished surface height of the filled grid. Setting this correctly before placing the panels saves significant adjustment later.
Step 5: Place and Interlock Grid Panels
Start placing panels from one corner of the installation area, working outward. Press each panel firmly down onto the membrane and engage the interlocking tabs or pins with the adjacent panel before placing the next one. Check that every interlock is fully engaged – a partially engaged interlock will open under load.
Cutting panels to fit: Where panels need to be cut at the edges or around obstacles, use a handsaw for straight cuts and a jigsaw for curved or angled cuts. Most polypropylene grid products cut cleanly. Mark the cut line on the panel with a marker pen and cut along the cell wall lines where possible to minimise the number of cut cells at the edge. Cut cells at the perimeter are held in position by the edging restraint.
Laying gravel grids on concrete: If the installation area has an existing concrete surface that does not need to be removed – a garage apron or a concrete path being surfaced over – the membrane can be laid directly on the clean concrete surface and the grid placed over it. The concrete provides an excellent rigid base. Ensure drainage has somewhere to go at the edges, as water cannot drain down through the concrete.
Step 6: Fill with Aggregate
Fill the grid cells with 10mm to 20mm clean angular stone, raking the aggregate across the panel surface so that it fills each cell evenly. Overfilling slightly – so that the fill level is 5mm to 10mm above the cell top – means the surface presents a consistent gravel appearance once the excess is raked flat.
Do not use a powered conveyor or dump truck to discharge aggregate directly onto the panels. The impact load from falling stone can damage panels and shift them out of position. Discharge aggregate onto a board or rubber mat laid on the panels and spread with a rake.
Rake the surface flat and check the fill level across the full installation area. Add more aggregate to any low areas and rake level again. The finished surface should be even, with cell tops just visible through the aggregate fill.
Gravel Grid Calculator: Quantities
Sub-base aggregate (tonnes per square metre): 0.15 tonnes per 100mm of compacted depth per square metre. For a 100mm driveway sub-base: 0.15 t/m2. For a 150mm sub-base: 0.23 t/m2.
Geotextile membrane (square metres): installation area plus 15 percent for overlaps and perimeter fold.
Grid panels (number of panels): installation area divided by individual panel coverage area, plus 10 percent for cuts.
Fill aggregate (tonnes per square metre): approximately 0.04 to 0.06 tonnes per square metre for a 40mm cell depth grid. For a 30mm cell depth grid, approximately 0.03 to 0.05 tonnes per square metre.